BUNKO MUSUBI - for nagoya obi
Often times, it may seem like the only Musubi you can tie with Nagoya obi is Otaiko.
This isn't true!
Here I'll guide you through how to tie something different with Nagoya obi-- A Bunko Musubi.
FIRST, You need a Nagoya Obi (any kind).
In the photos, I'm using presewn nagoya, which means half or more is already folded and sewn in half for making Otaiko easier to tie.
This isn't true!
Here I'll guide you through how to tie something different with Nagoya obi-- A Bunko Musubi.
FIRST, You need a Nagoya Obi (any kind).
In the photos, I'm using presewn nagoya, which means half or more is already folded and sewn in half for making Otaiko easier to tie.
Don't let this scare you from using this kind of obi for other bows!
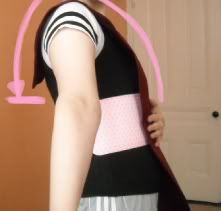
Take an end, and hold it in front against you. Let it fall to about the middle of your back.h
This will form the small end for the middle of the bow. If using a sewn Nagoya obi, you must use the sewn end for the end in this step.
Lift up the long end and fold it to go horizontally.
This is the piece that will wrap around you, so go ahead and...
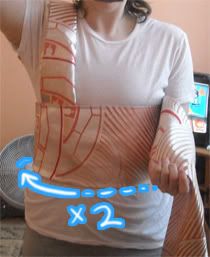
Wrap it around you!
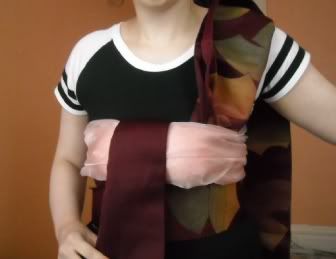
It should go around you a minimum of TWO TIMES. If the obi is very long, you can do it one more time.
If the obi is very long, and you want a longer bow, do not wrap it a third time.
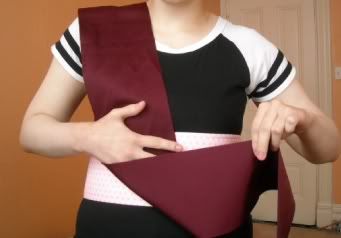
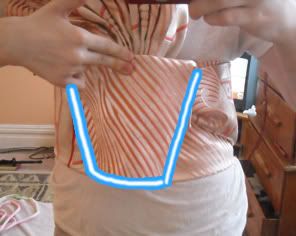
Please tie these ends tightly.
Make sure that the short end is on top.
Tie on you Obi Makura and Obiage.
Put them on top the the knot you just made.
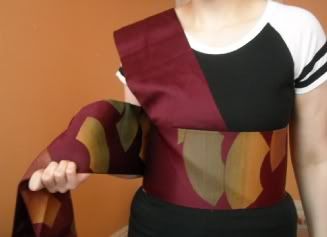
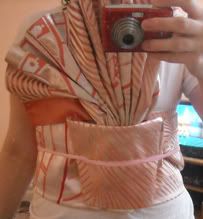
Adjust the ends.
Pull the long end horizontally and full width. If you're using a sewn Nagoya obi, you should now probably or almost be at the part that's not sewn.
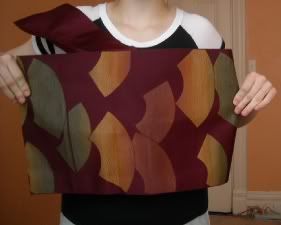
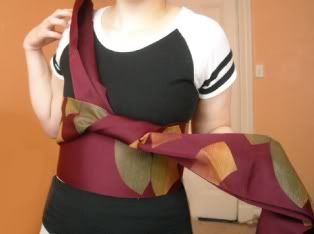
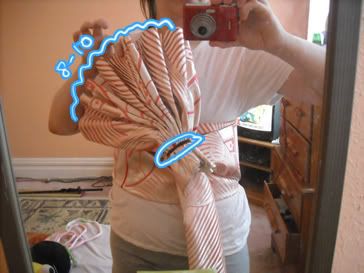
Fold this.
Fold it in half. Then, fold each side backwards. It should look like a " M " shape from the side.
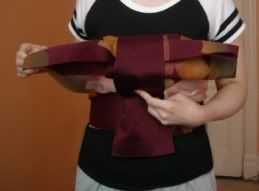
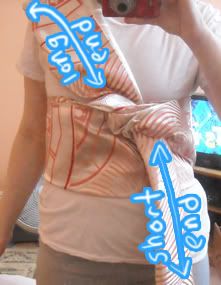
Bring around the short end and wrap as much and you need.
Wrap the short end around the long end, Obi makura, and Obiage.
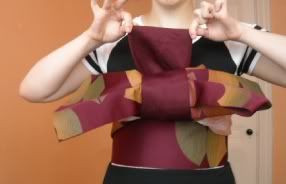
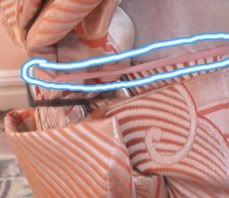
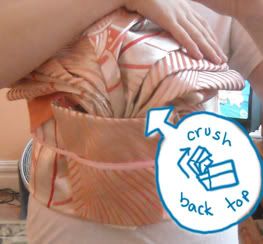
Tuck the left over bit underneath.
Underneath meaning behind the bow/makura and the section wrapped around you.
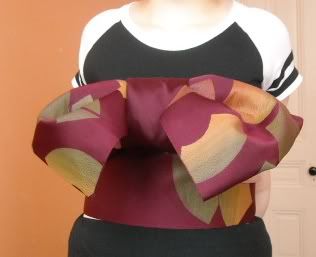
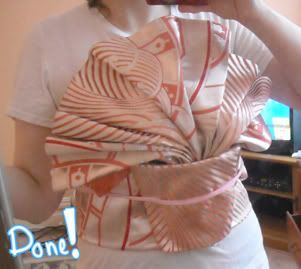
COMPLETE!!
Adjust the wings of the bow as you'd like. Carefully turn the whole thing around so the bow is at your back.
Finish everything up, tie on Obijime, and you're done!
I hope you enjoyed and could understand this little tutorial!
Take an end, and hold it in front against you. Let it fall to about the middle of your back.h
This will form the small end for the middle of the bow. If using a sewn Nagoya obi, you must use the sewn end for the end in this step.
Lift up the long end and fold it to go horizontally.
This is the piece that will wrap around you, so go ahead and...
Wrap it around you!
It should go around you a minimum of TWO TIMES. If the obi is very long, you can do it one more time.
If the obi is very long, and you want a longer bow, do not wrap it a third time.
Please tie these ends tightly.
Make sure that the short end is on top.
Tie on you Obi Makura and Obiage.
Put them on top the the knot you just made.
Adjust the ends.
Pull the long end horizontally and full width. If you're using a sewn Nagoya obi, you should now probably or almost be at the part that's not sewn.
Fold this.
Fold it in half. Then, fold each side backwards. It should look like a " M " shape from the side.
Bring around the short end and wrap as much and you need.
Wrap the short end around the long end, Obi makura, and Obiage.
Tuck the left over bit underneath.
Underneath meaning behind the bow/makura and the section wrapped around you.
COMPLETE!!
Adjust the wings of the bow as you'd like. Carefully turn the whole thing around so the bow is at your back.
Finish everything up, tie on Obijime, and you're done!
I hope you enjoyed and could understand this little tutorial!
posted by tohlee @ 9:18 AM
1 Comments
![]()
